Unboxing Raspberry Pi devices
In this lesson, you will unbox your Raspberry Pi devices and prepare them for the cluster setup, and learn about the hardware components and their roles in the Kubernetes cluster.
This is the 4th lesson of the guide Building a production-ready Kubernetes cluster from scratch. Make sure you have completed the previous lesson before continuing here. The full list of lessons in the guide can be found in the overview.
What You Will Need for This Lesson
To get started, make sure you have the following components:
- You will need at least three Raspberry Pi 5 devices, ideally with 8GB of RAM for better performance.
- Each Raspberry Pi requires a 64GB (or higher) microSD card, with high-endurance cards recommended for reliability.
- For persistent storage, you will need at least 500GB NVMe SSDs along with compatible NVMe HATs for each Raspberry Pi.
- Each device also requires a 5V/5A USB-C power supply to ensure stable operation.
- To connect all Raspberry Pi devices, you will need a gigabit wired router like the TP-LINK ER605 (or any other networking router) to create a local network for your cluster.
- You should have CAT5e or higher Ethernet cables available to connect the Raspberry Pi devices to the router.
Unboxing the Raspberry Pi Devices
When you unbox each Raspberry Pi, make sure you have:
- The Raspberry Pi board itself.
- The microSD card that you will use for the operating system.
- The power supply and any necessary cables.
- The NVMe HATs and SSDs for storage.
Check that all components are in good condition and set aside any packaging materials. Carefully handle the Raspberry Pi devices by the edges to avoid touching the board’s components.
Preparing the NVMe SSDs and HATs
Next, you will need to set up the NVMe SSDs for persistent storage.
- Insert each NVMe SSD into the corresponding NVMe HAT.
- Attach the NVMe HAT to each Raspberry Pi. Ensure the connection is secure and that the SSD is correctly seated.
Connecting the Raspberry Pi Devices
Once you have assembled your Raspberry Pi devices, you can connect them to the network:
- Connect each Raspberry Pi to the gigabit Ethernet switch using an Ethernet cable. Make sure each device is connected to a different port on the switch.
- Plug in the USB-C power supply to each Raspberry Pi and connect it to a power outlet.
- Ensure all devices are powered on and that the LEDs on the Raspberry Pi boards are lit, indicating they are receiving power.
Setup The Network
Unbox your router and connect it to a power source. Connect the router to your internet source using an Ethernet cable plugging it into WAN. Connect the Raspberry Pi devices to the router using Ethernet cables.
Now connect your computer to the router using an Ethernet cable (and if necessary an adapter). Confirm you are able to access the internet from your computer by opening a web browser and navigating to a website, e.g. philprime.dev.
Now we configure the router to assign static IP addresses to the Raspberry Pi:
- Open the router configuration page by typing the router’s IP address into your web browser. The IP address is usually
printed on the router itself or in the user manual, but can also be found the network details of your computer. In our
case it is
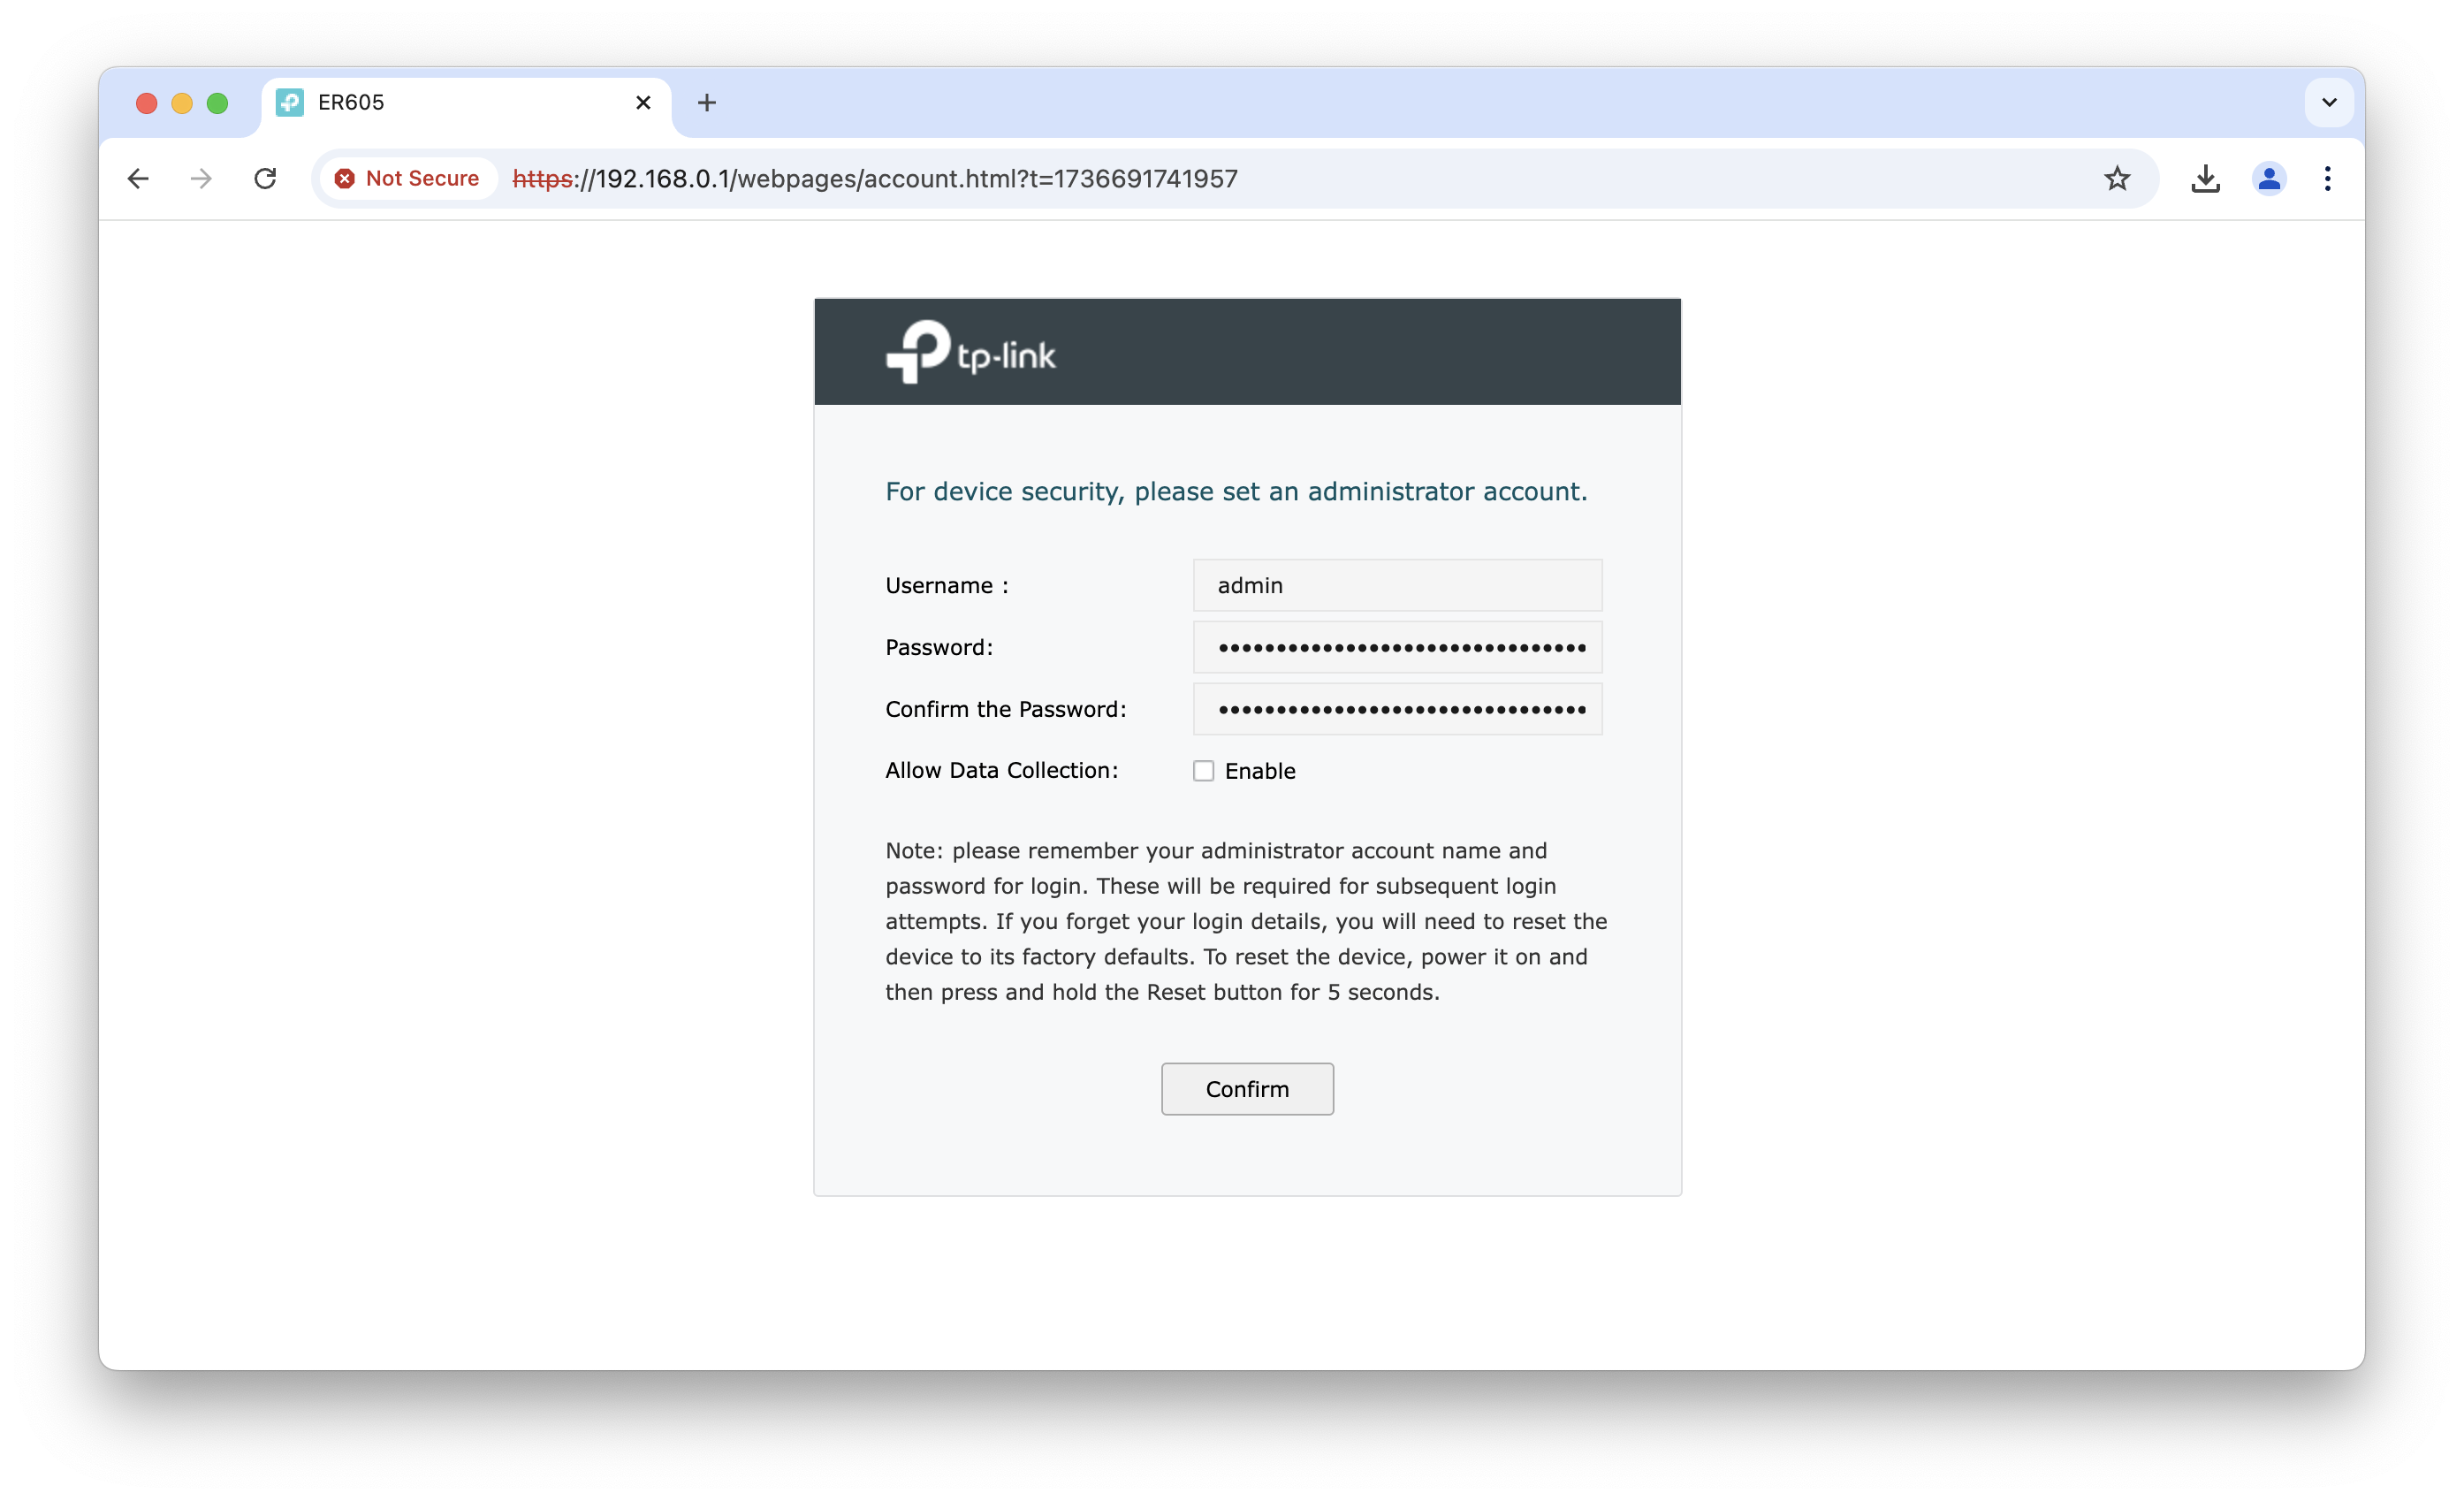
https://192.16.8.0.1. - Log in to the router using the default username and password. You might get prompted to change the password. Do so if
necessary.
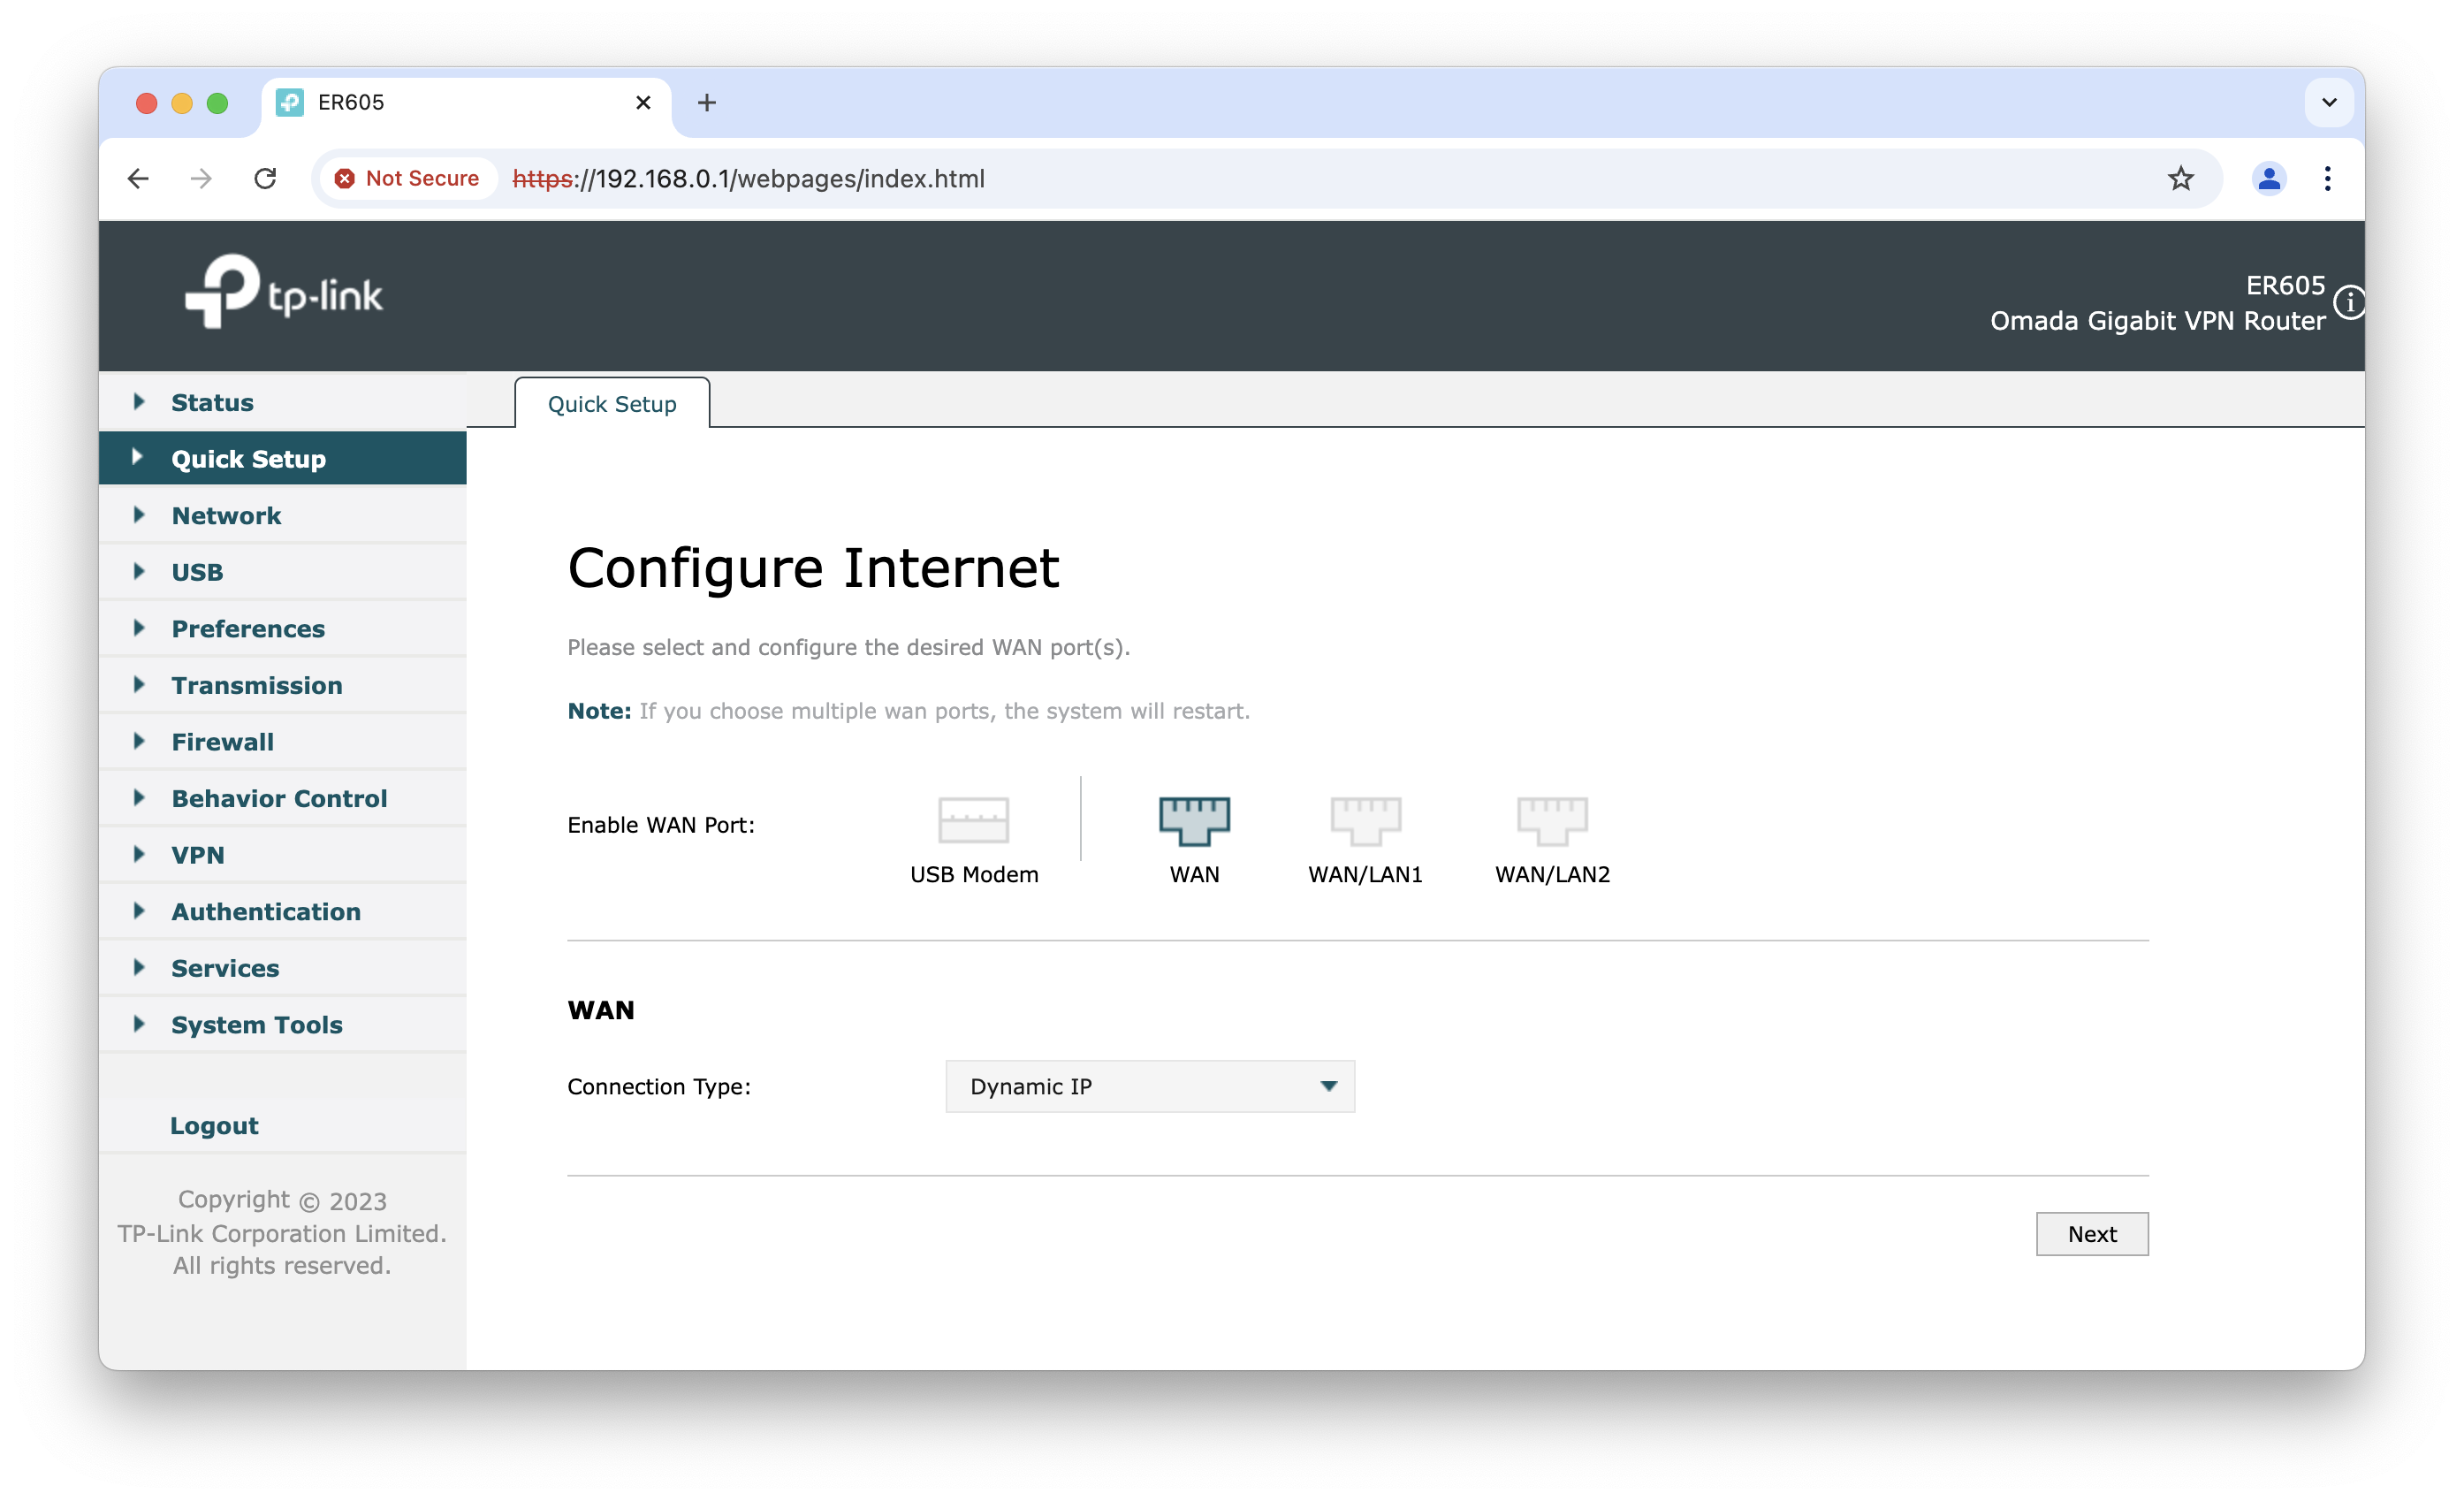
- Configure the additional WAN port as a normal LAN port. This will allow you to use all 4 ports for your Raspberry Pi
devices and your computer.
- To change the network settings, navigate to Network > LAN in the side menu and expand the settings of the standard
LAN 1.
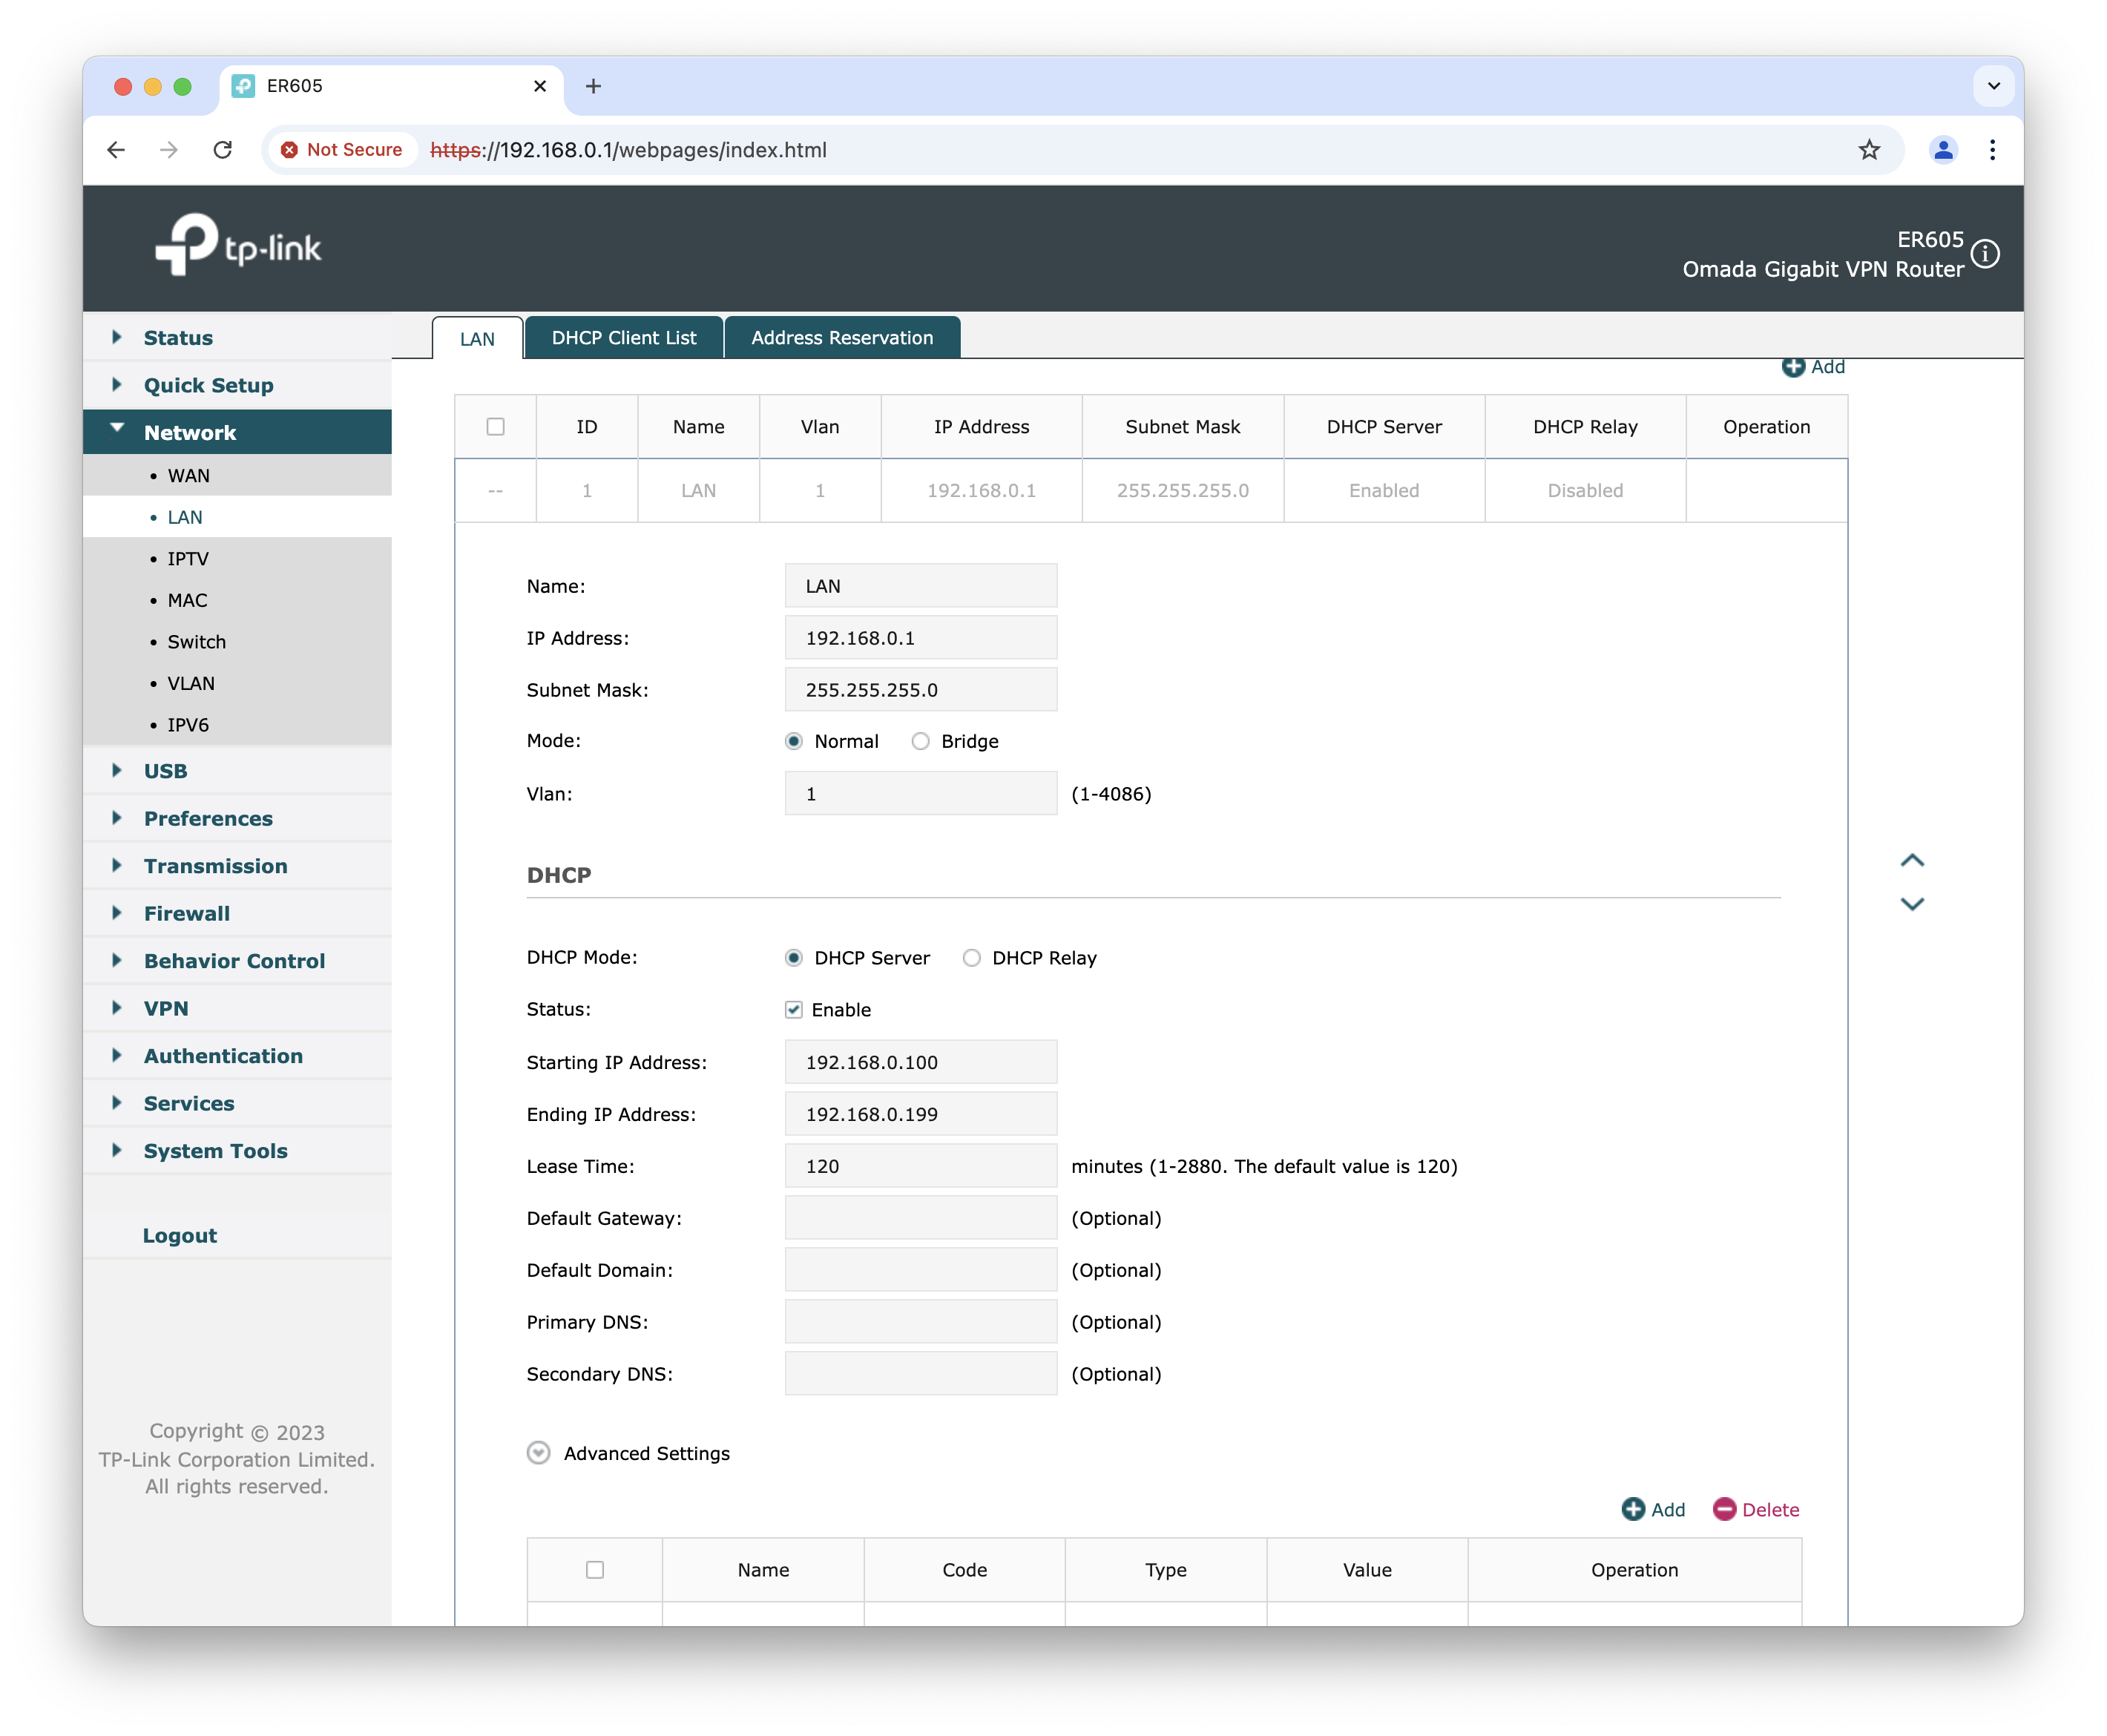
- The default IP address of the router is
192.168.0.1with a subnet mask of255.255.255.0(CIDR192.168.0.1/24) allowing a total of256hosts. To support a larger number of devices, we will change the subnet mask to255.255.0.0allowing a total of65536hosts. In addition, as the WAN network is10.0.0.0/24, we’ll change the IP address range of the router to10.1.0.0/16, with the router using10.1.0.1. - To have full control over our network, we will disable the DHCP server on the router. This will allow us to assign
static IP addresses to our Raspberry Pi devices.
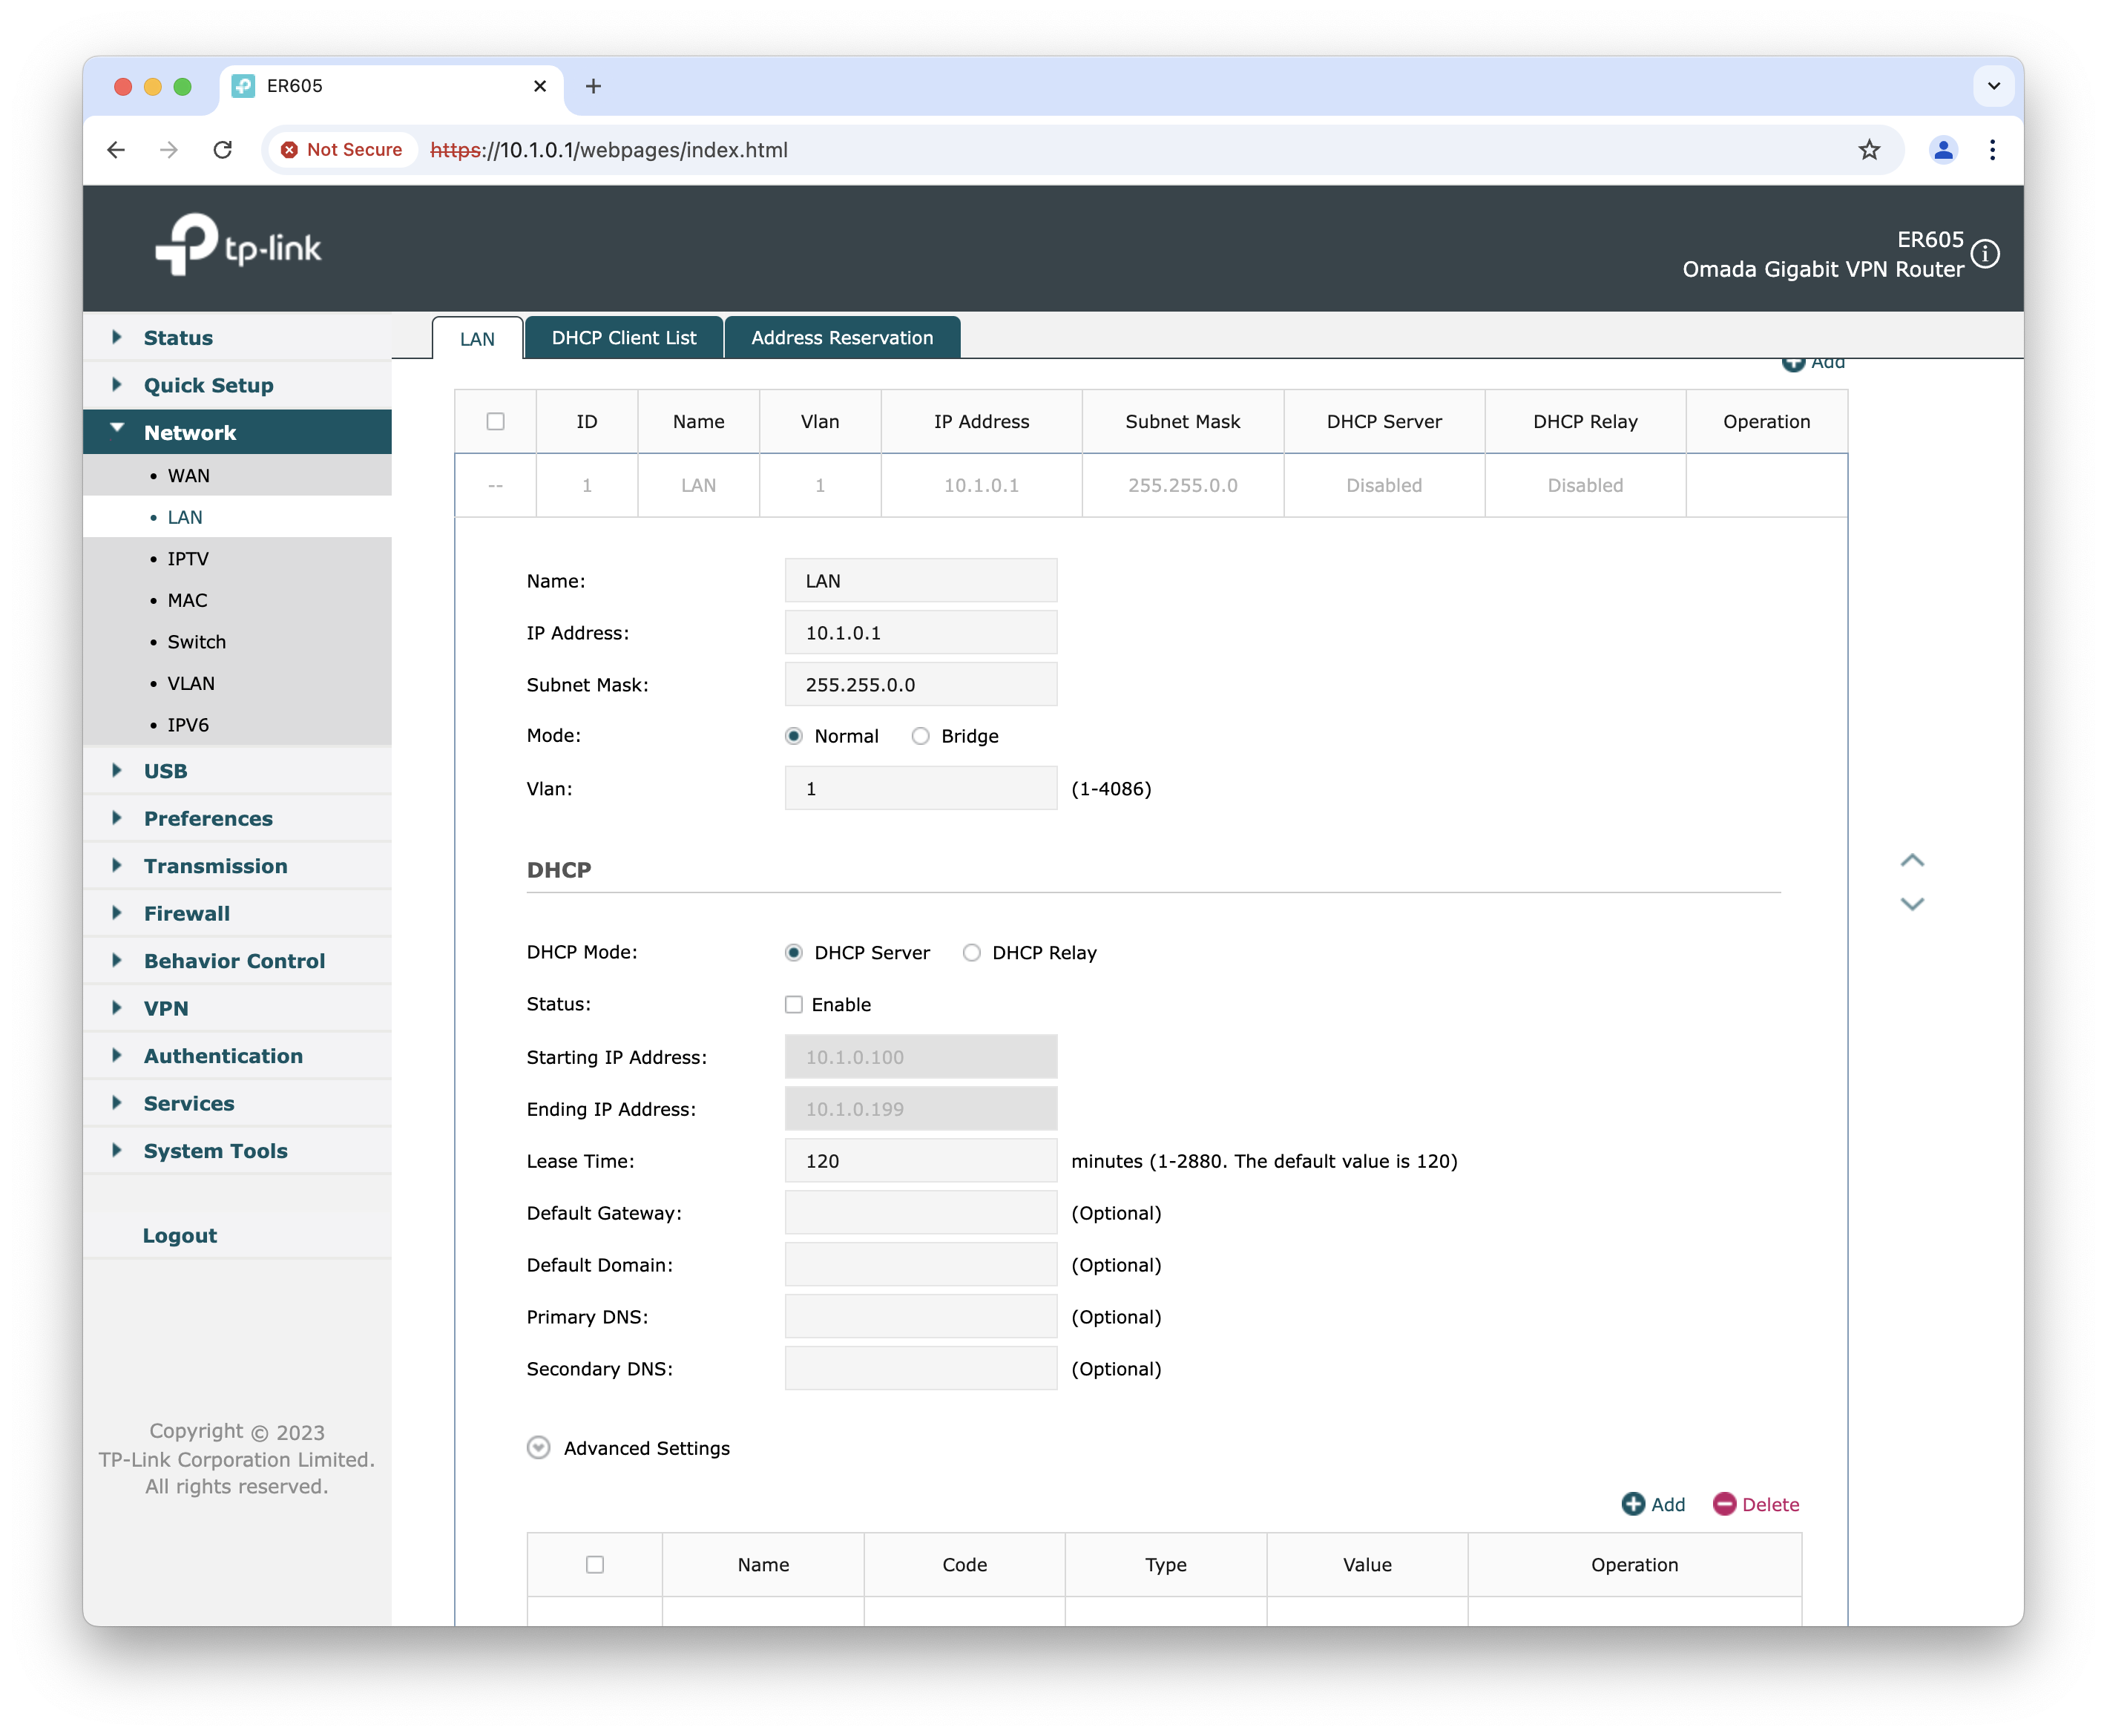
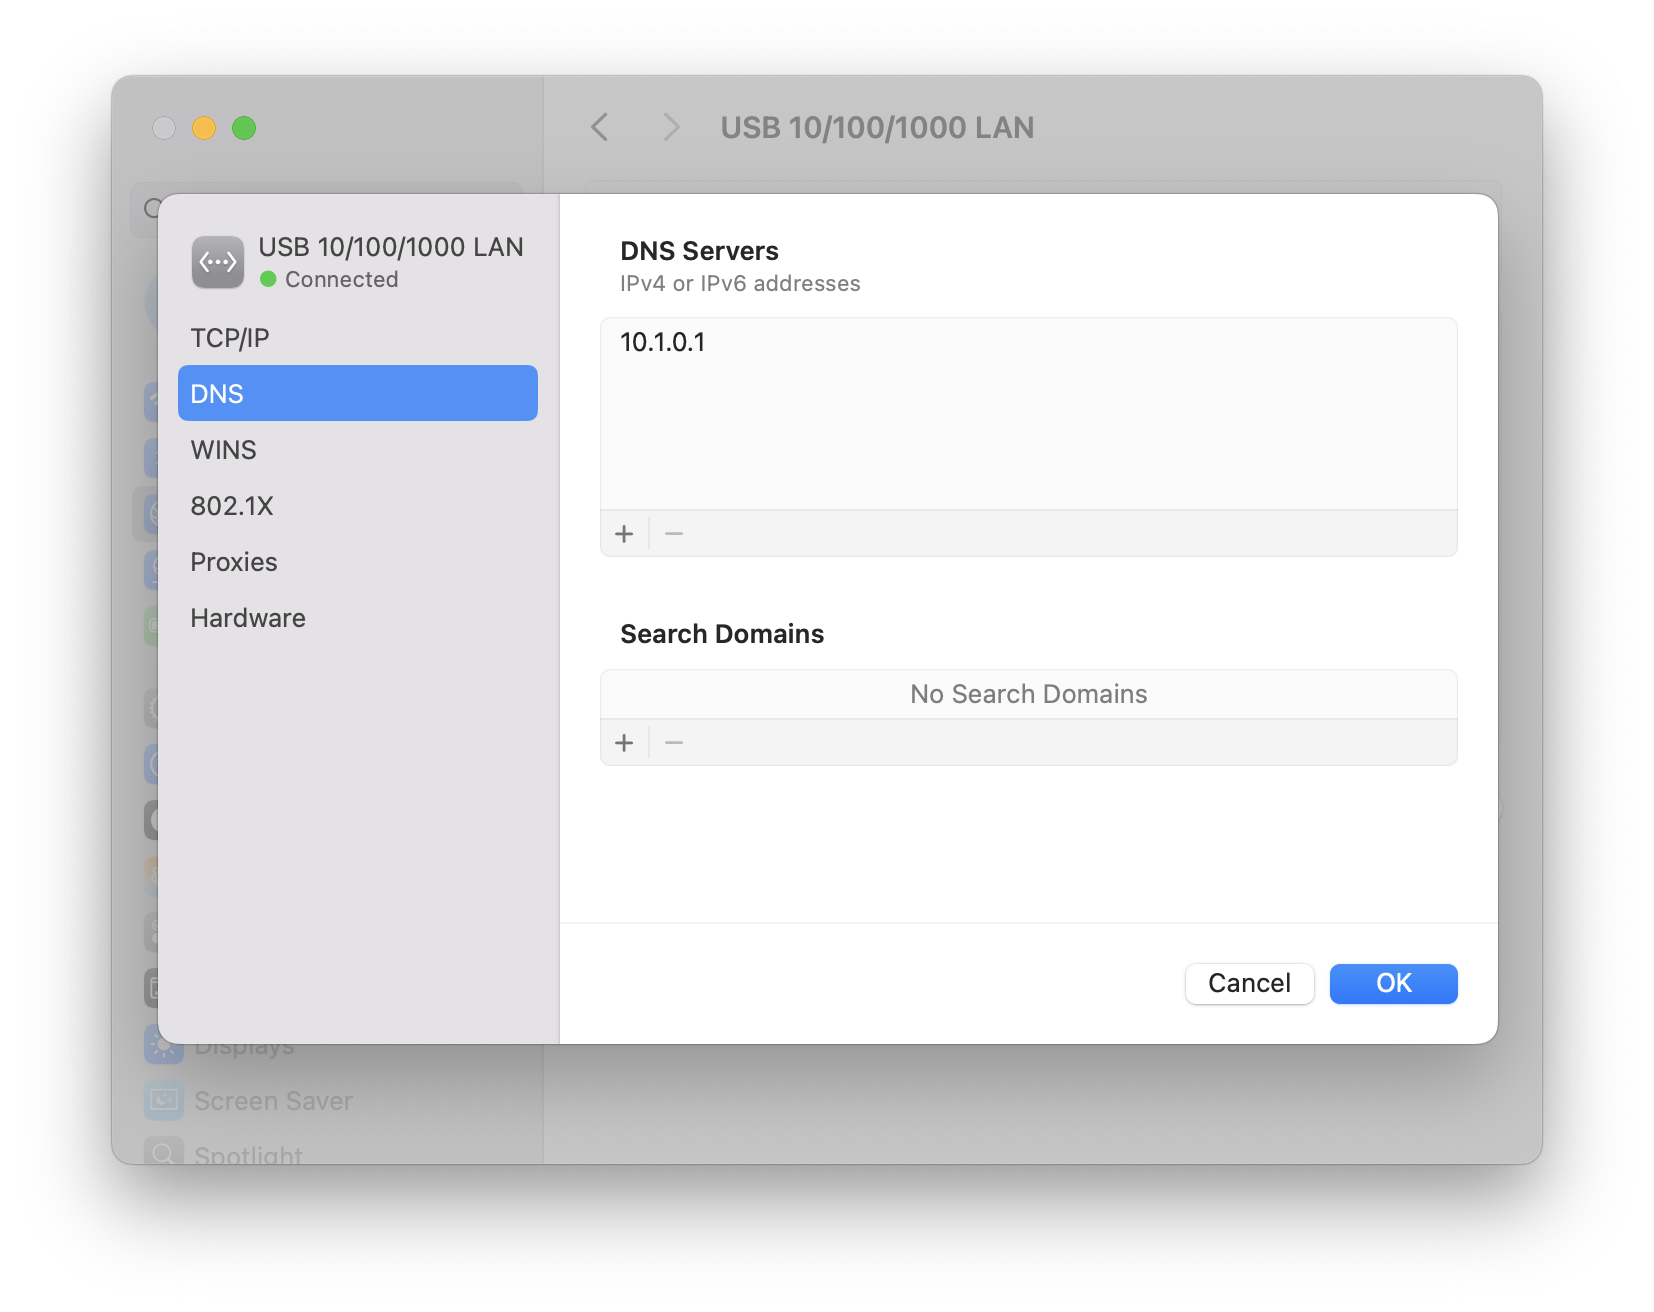
- After applying the changes, make sure to change your computer network settings to manual using the IP address
10.1.0.2and the subnet mask255.255.0.0, with the DNS server also set to10.1.0.1(to use the router as a DNS server).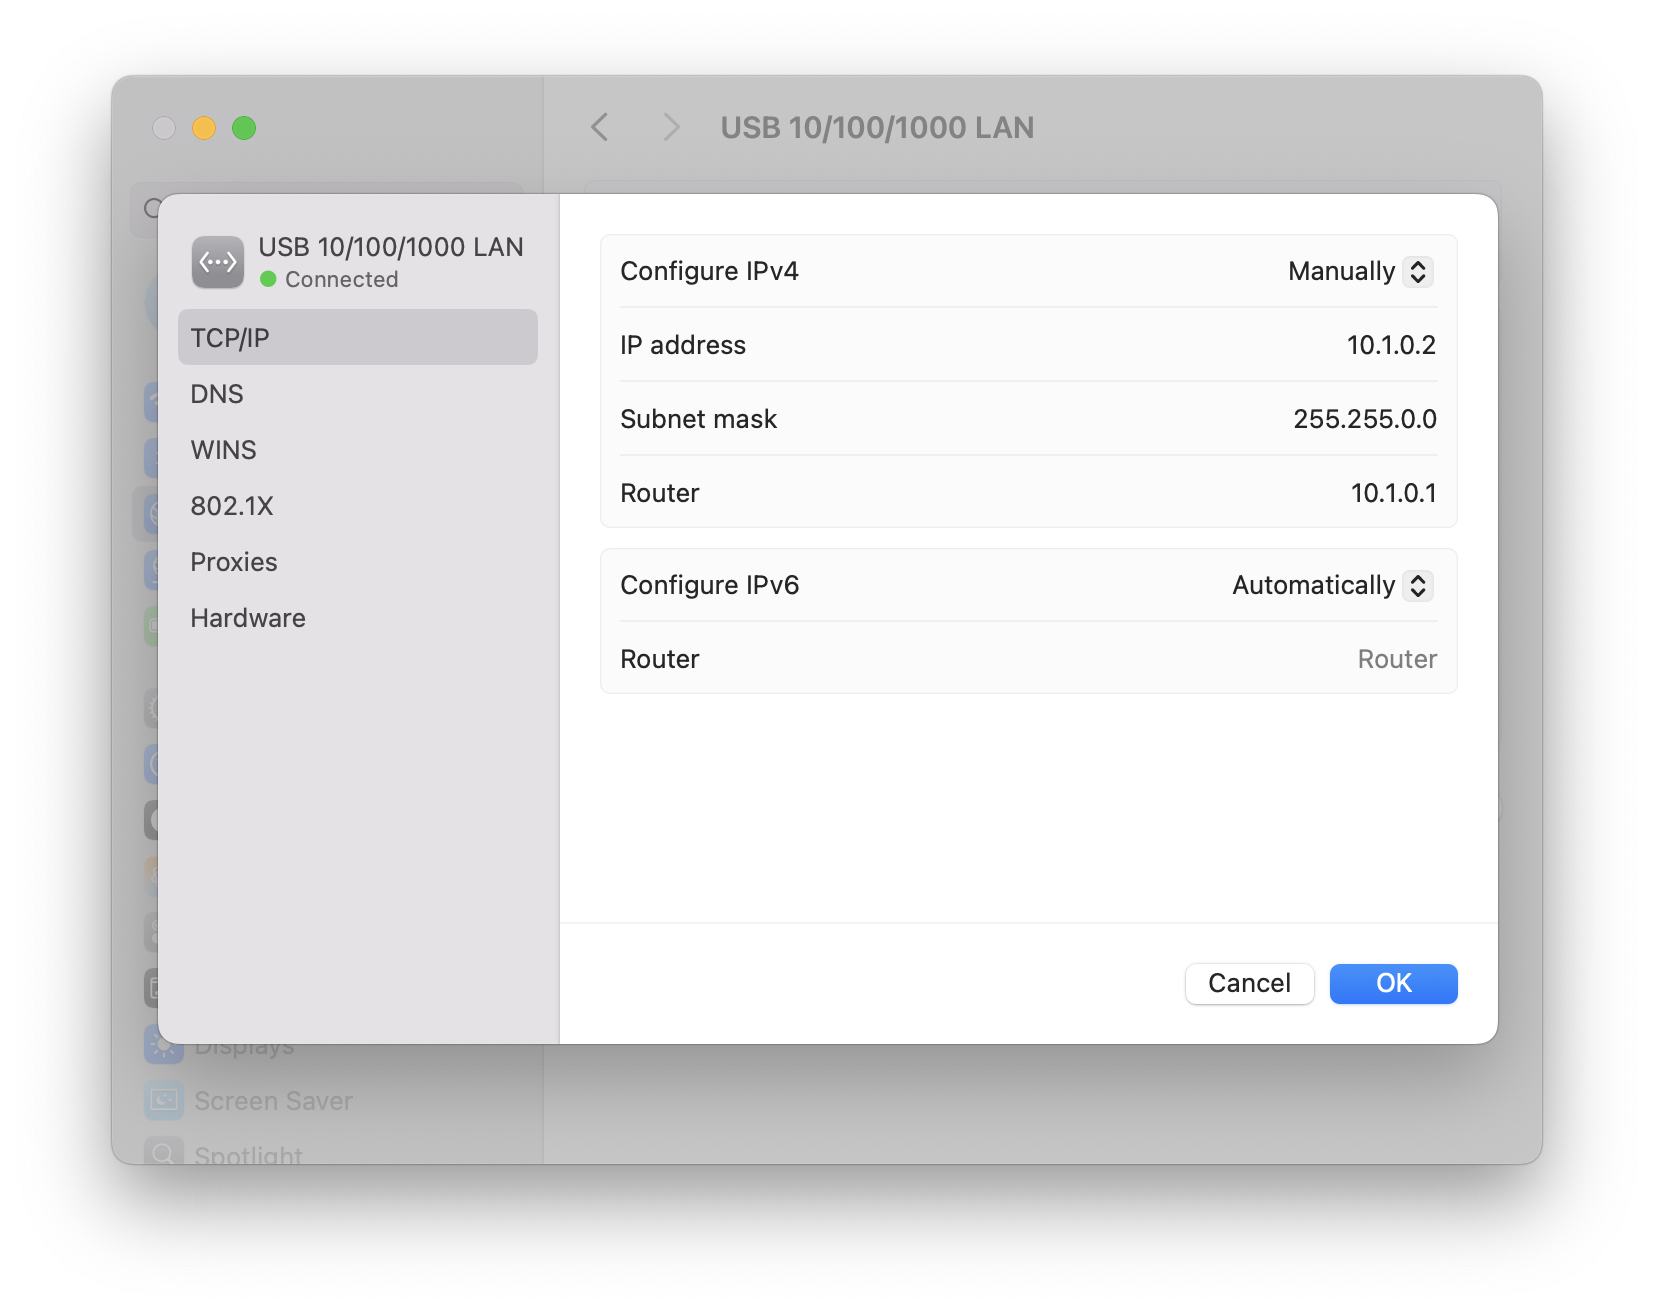
Final Setup
At this stage you should have three Raspberry Pi devices, each with an NVME SSD storage device attached. The devices should be connected to a network router and powered on. The Raspberry Pi do not have an microSD card with an operating system yet. Your computer should be connected to the same network and have a static IP address assigned, being able to access the internet.
Lesson Conclusion
Congratulations! You have completed this lesson and you can now continue with the next one.